Step by step guidance to make a wordpress website
Many years back, when I got fascinated with the web development world, I decided to create my own website but then I noticed most websites were developed using HTML, CSS and what not. Learning those seemed wayward that time and it took high effort and huge time to master.
One of the reasons why still most people consider developing a website as an impossible task and think that it requires a knack of coding and designing. But this is no truer !!
Today, CMS (content management systems) like WordPress have made developing a website open to all. Simply putting, CMS is a user-friendly platform for developing your own website and handling your content on your own, rather than using lengthy codes.
Enough of description, let’s proceed to the main segment – Steps to make a WordPress website.
STEPS TO MAKE WORDPRESS WEBSITE
- 1. Log in to your hosting account. Click here to know how to create your hosting account.
- 2. Go to your control panel.
- 3. Create a database.
- 4. Go to your file manager “public_html” Folder and upload the WordPress file (You will have to download WordPress file from https://wordpress.org/download/ ).
- 5. Now go to your domain and select a language, click on “Continue” button. After that, click on “Let’s go!” button.
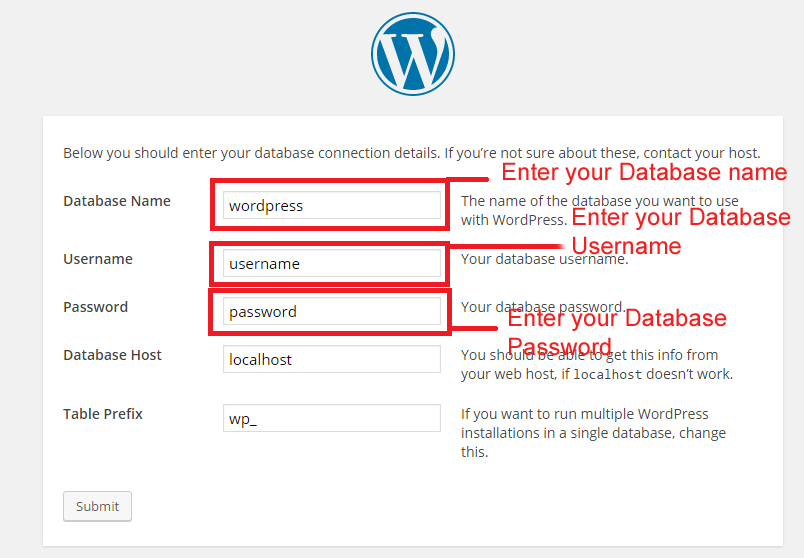
- 6. Then enter your —
i. Database name ii. Database user name iii. Your database Password .
Don’t make any changes in the database host and table prefix, leave it as it is and click on “Submit” button. On the next page click on “Run the install” button.
- 7. On the next page enter —
i .”Site Title” as per your choice. Enter Admin Username and Password (If your password is
Then, enter Admin Username and Password (If your password is weak then click on “confirm use of weak password”. Lastly, enter your email id and click on “Install WordPress” button. After Installation, click on “Log In” button and enter your admin username and password (By default you can log in your admin panel www.yourdomainname.com/wp-admin ). 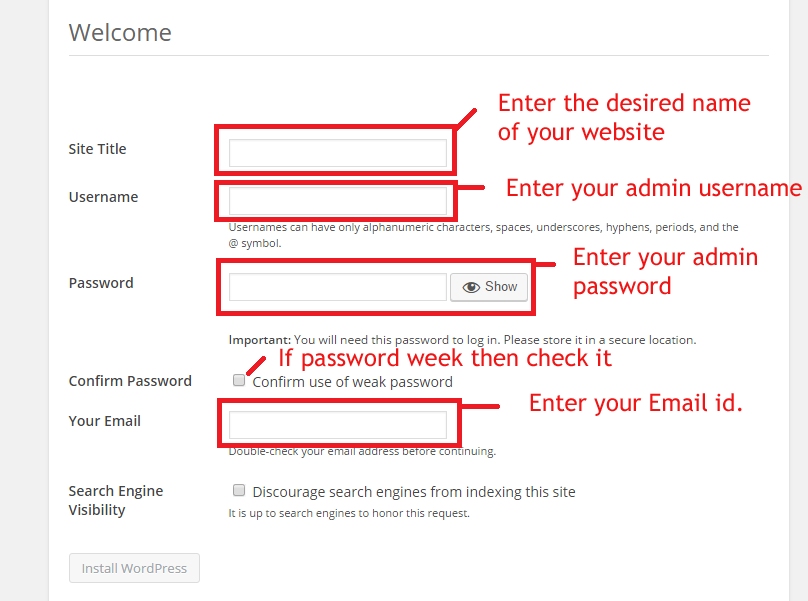
- 8. After login, you will be directed to the dashboard section where will find all the settings. Go to the “Themes” section where you can choose a theme and activate it.

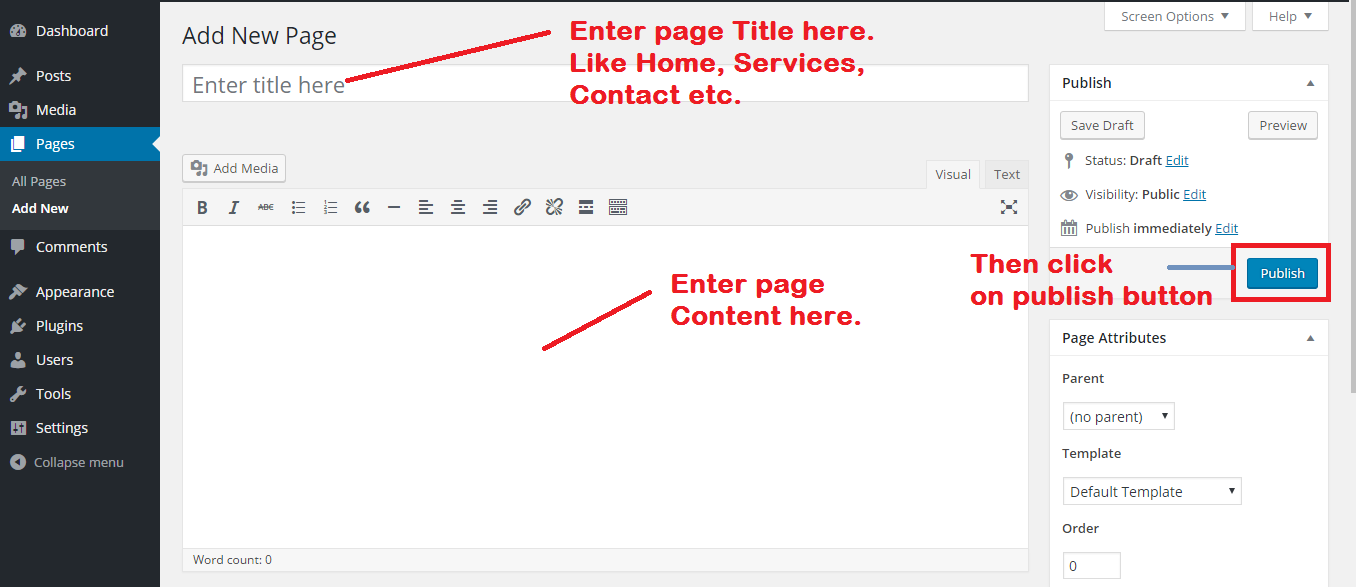
- 9. Then go to “Pages” -> Add New Page. You can create pages of your choice like Home, Services, Contact etc.
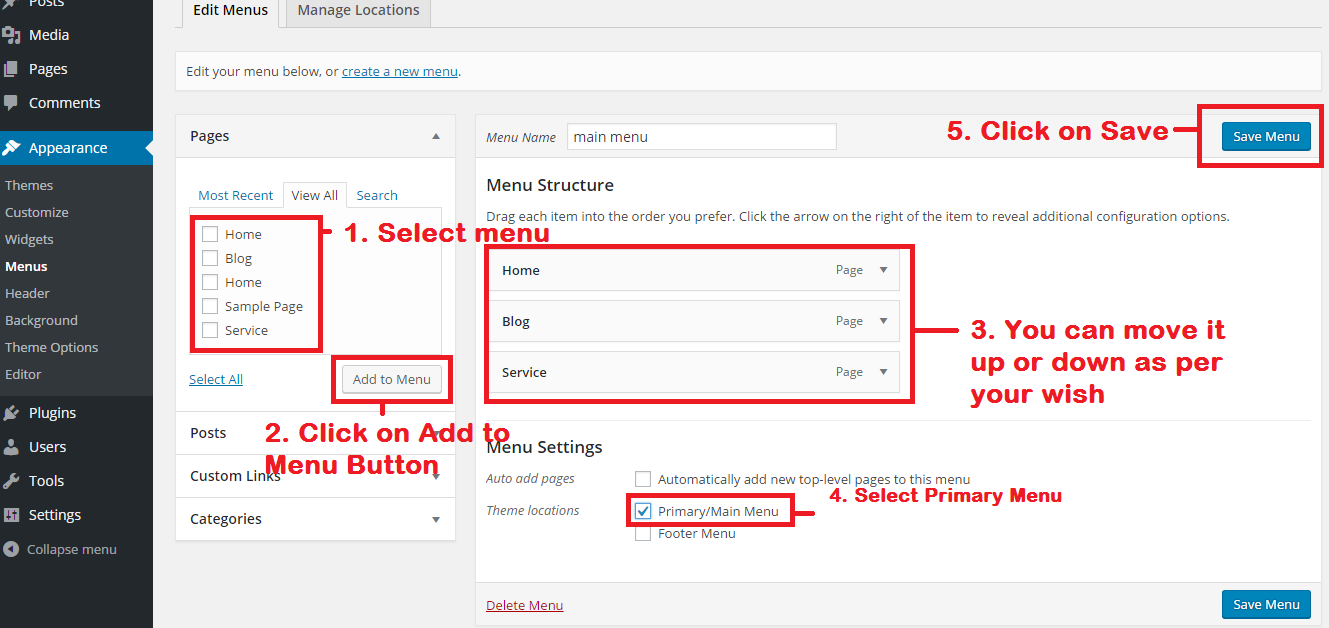
- 10 . After creating pages go to “Appearance” to edit frontend visual-> Go to “Menus” and create a menu, put a menu name like “main menu” and click on create button. on the left-hand side, you can select menu options like which page to insert, tick that box and click on add menu – then swap it up or down as per your requirement. Click on “save menu” to save the settings. “Primary menu” or main menu means header while the footer will result in footer menu .
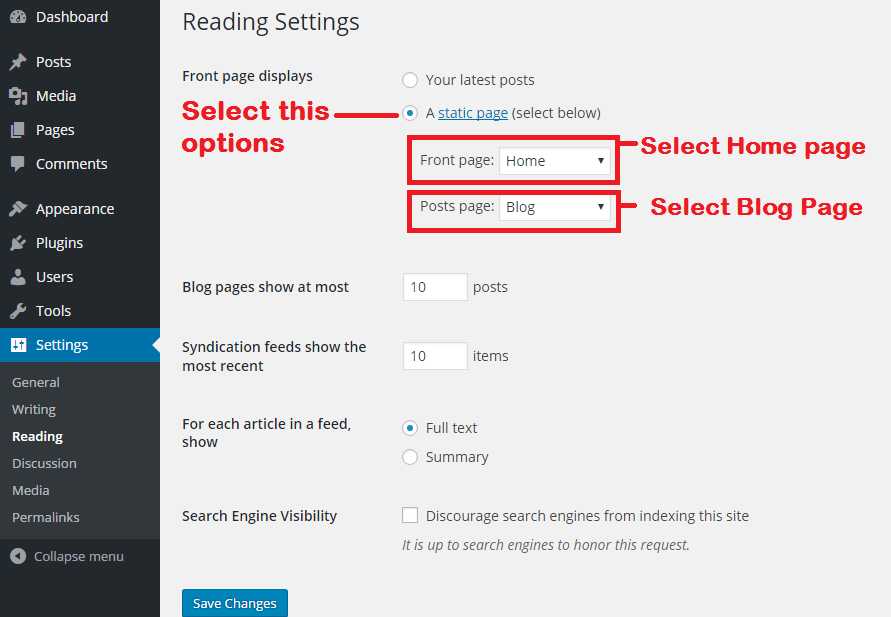
- 11. Go to Setting->Reading. For “Front page displays” select “A static page (select below) ” this option. For “Front page” select the Home page and for “Posts page” select Blog page. Then click on “Save Changes” button.
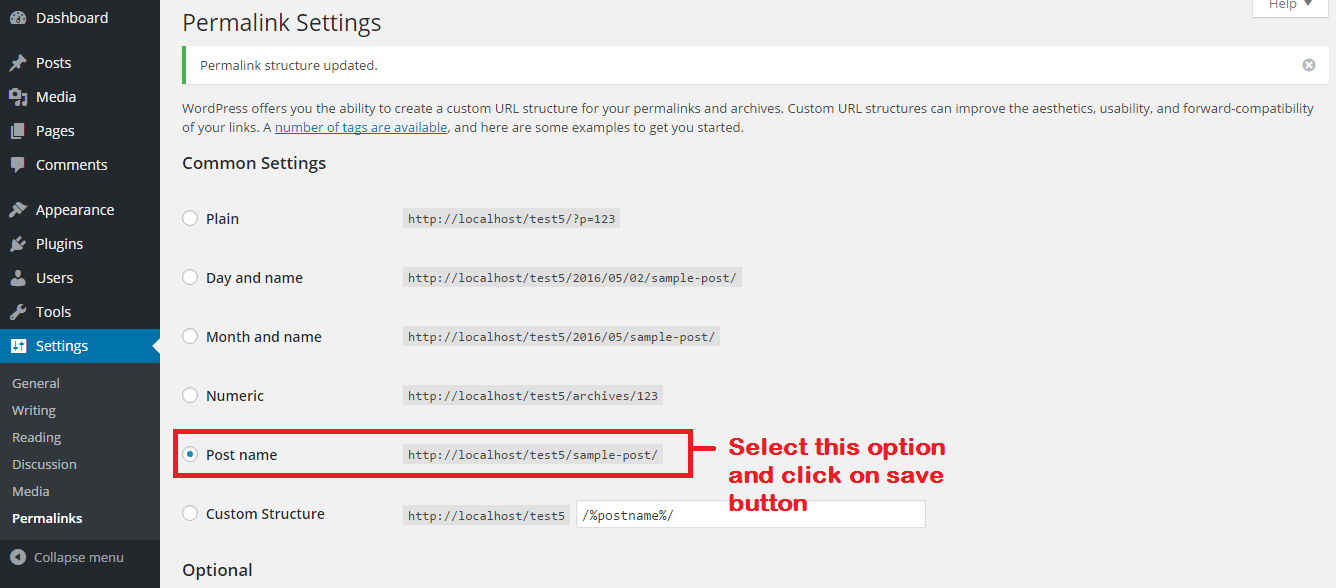
- 12. You can change the URL as per your requirement – like post name, post date, –in permalinks. Go to Settings – > Permalinks select “Post name” option and click on “Save Changes” button.
- 13. For a blog post, Go to Post -> Categories and create your Categories. Then go to Post -> Add New Post. Enter a post title, Post content, select a “categories” and select a “Featured Image” then click on Publish button to make it live.
There are much more things to explore in WordPress. Signup to our newsletter to remain connected and receive all our posts directly in your inbox.
Feel free to comment if you have any questions/suggestions or if you simply want to say Hi !
Anupam Maity, May 14, 2016


